So you’ve fallen in love with blowing bubbles, and now you want to learn how to lock in those underwater memories in photo form. But where do you start in the world of underwater photography? Do you slip your phone into a fancy underwater case, grab a GoPro, or dive straight into a dedicated camera with housing?
The fact is, you can go a bit crazy with your underwater photography setup, but this article is for those who are still trying to figure out the basics. Someone who is just not so sure where to start. We won’t get too technical, but we will discuss basic underwater photography practices, gear, and courses you can consider to improve your skills.
What is Your Diving Level?
So if you’re a pro, either a divemaster or an instructor, you know you have your buoyancy down pat to excel in underwater photography. But what about if you’re just starting out? A lot of people will want to grab a camera on their first dive. Typically, that would be with a GoPro or your phone in an underwater casing. However, if you are newly certified and have only a few dives under your weight belt, diving right into underwater photography might not be so advisable. You will want to ensure you are 100% confident underwater before you explore any underwater photography. Heck, how are you supposed to capture that turtle cruising by if your buoyancy skills aren’t locked in? This may seem really basic, but it is important to consider your skill level and understand that taking photos underwater will be a secondary priority while diving. Your first priority is your safety! You need to be honest about your diving level and general comfort level underwater before you start throwing other elements into the mix! If you’re taking a dive course with a dive center, your instructor can tell you whether you’re good to go or if you should refine your basics first. Just remember, take it easy, be kind to yourself, but also, realistic about where your skills are.
Determine Your Underwater Photography Goals
Now that we know you’re comfortable underwater and have the skills, your photography goals will be the leading factor in what direction you head. Before you splurge on gear, you will want to ask yourself a few questions. Do you want to casually snap photos for fun memories of Manta Rays for Instagram, or are you looking for your next masterpiece to hang on your wall? How often do you dive, and do you like to capture photos every time you dive? If this is something you think could evolve into a substantial hobby? Will you be diving deep, taking a lot of videos, or will you need an extensive light setup?
It’s worthwhile to consider what you want to get out of your photography to know what will be best for you. Like anything, you can take it on as a simple hobby or go headfirst into the deep end with all the bells and whistles. Your main goal for your underwater photography will dictate which avenue you take and how much money you spend!

Selecting Your Equipment
After you have decided on your goals, we can now consider the pros and cons of each setup. It might be that you are 100% ready– the “I love scuba, I’m going to be a professional underwater photographer” kind of ready, if so, jump into a dedicated camera. But for many of us, the GoPros or phone casings will work out just fine.
Phone Casing
Pros: You already own the camera! And the photos you take will already be on your phone, which might be a worthwhile convenience for some.
Cons: Bulkier grip, and sometimes the touch pad underwater can be a little tricky to get the hang of. Lighting can also be an issue, especially at greater depths. So it might be challenging to go beyond novice usage.
Tip: The underwater housing might take a bit to get used to. On some models, there is a liquid barrier between you and the screen. This makes the touch screen functions sometimes a bit difficult to master. Clear space on your phone before you dive. Nothing’s worse than a ‘Storage Almost Full’ alert mid-shoot!
GoPro
Pros: Rugged and versatile as well. On its own, the newest models are waterproof to 10 meters out of the box, or you can get housing that is waterproof down to 60 meters. Great 4K video (Hero11 Black or newer), small and compact, so easy for traveling.
Cons: You will run into the same issue with light as with the phone case as you go deeper. GoPros are also known not to be very good with macro, which means you may miss out on that pygmy seahorse you were trying to capture!
Tip: Level up your GoPro with a red filter, video light, and dive housing for deeper dives.
Beginner’s Camera with Casing
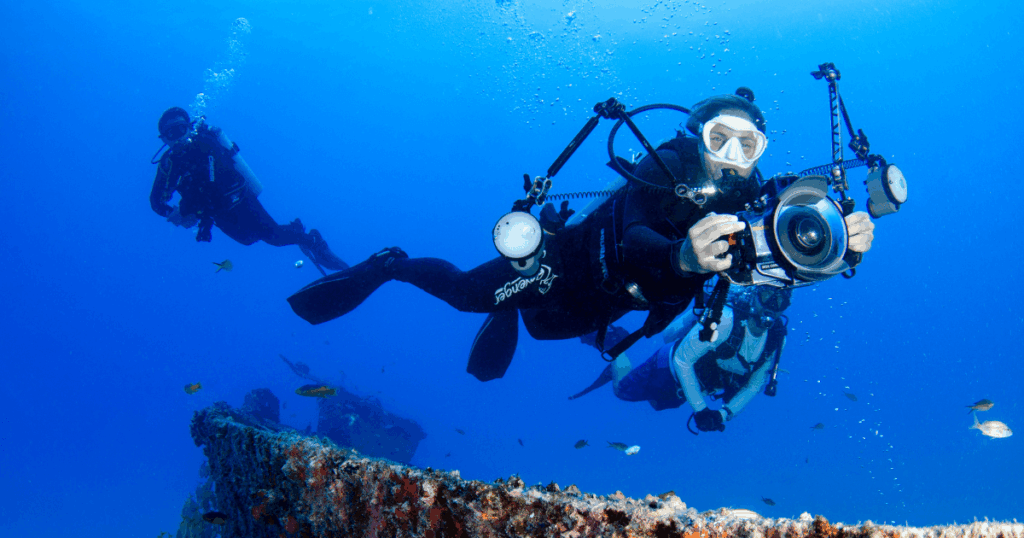
You’ll want to consider a rig setup if you want full control and flexibility with your underwater shots. With the limitations that phone casings and GoPros bring, having a dedicated camera with housing will allow you to snap crisper and better-lit photos. You can also add onto your rig with different lighting, lenses, and filters to really step your photography game!
Pros: Full flexibility and control over your photos. With a rig, you can add external strobes, adjust lighting placement, change your camera settings and have more variety to do so and produce a higher quality image.
Cons: Can be quite expensive, and if you get really into it, you may end up needing the max luggage allowance on flights to accommodate all your gear!
Tip: If you love scuba diving and taking photos, this would be a no-brainer. Invest in the right equipment and get shooting!
If you’re wondering where to start, the Olympus TG-6 is a great choice. It is built for underwater use without casing up to 15 meters and has pretty good functionality. If you are all in and want the best of the best, the options become endless, but as a beginner-friendly option, this is your go-to.
Basics of Underwater Photography
Now that you know what you want to buy, how will you learn to grow your underwater photography skills? Like many things, practice makes perfect. Below is a list of things you want to keep in mind when starting your underwater photography journey.
- Practice on land. Learn your controls, memorize menus, and rig up your housing or case before you get in the water.
- Perfect your buoyancy. A neutral trim is super important. The more stable you are, the better underwater photographer you will be.
- Shoot up. Get level with your subject or aim your lens upward for dynamic shots and richer colors.
- Get close. Water absorbs light and adds haze. We could talk about backscatter forever but we will save that for another article. Make sure to fill your frame and get as close as you safely can with your camera… not your zoom function.
- Respect the reef. No touching coral or critters!
Underwater Photography Etiquette
Oof, this is going to be a touchy subject for some divers, but we need to chat about it. Remembering that your photography is secondary to diving is key. It can be so easy to be consumed by making sure you have the best photo that you forget that there are other people around who want to see the subject as well. Spatial awareness is key! Remember to know your surroundings and try your best not to disturb the ocean life around you. Here are a few reminders for you:
- Never touch coral, critters, or the bottom. Sometimes it will be ok to touch your fin gently into the sand to hold your position. Basic etiquette will be to ensure you’re not damaging anything around you while you’re shooting.
- Keep fins down—avoid stirring silt or crushing life. This speaks to the point above but also your photos will be a lot better if you are not creating a mess by flapping your fins in the sand.
- Mind your buddy—don’t drift off chasing a shot. Also, don’t forget you’re not the only one who might want a closer look! Even those without cameras will want an up-close and personal view of that cool underwater critter you just found.
- Use no-flash when appropriate—avoid startling marine life in close quarters.
- Leverage the experts—let the divemaster know your photo goals so they can help you find ideal sites and critters!
Now that you have a roadmap, from phone case to dedicated compact with strobes, you’re ready to capture your next underwater adventure. Remember: practice, respect the reef, and have fun making memories that last long after the dive!
FAQ—Beginners Guide to Underwater Photography
How do I learn more about Underwater Photography?
Consider taking the PAID Digital underwater photography course at Crystal Divers. You will learn how to set up your camera correctly and get tips on maintaining your housing to ensure its longevity. We will take you through photo composition, subject placement, how close you should get to your subject, and all proper lighting placement. There is so much you can learn about underwater photography. A practical, all-inclusive starting point is with this course.
Do I really need a strobe or light?
Depends on how deep you will go. Below about 10 m, natural light fades quickly and colors shift blue/green. A small strobe (e.g., Inon Z-330 or Backscatter MF2) or video light will restore color and contrast.
Can I start with just my phone?
Yes! Phone housings rated to 30 m exist. We have a DIVEVOLK we love to play around with and is rated to go quite deep. You’ll get OK shots in bright, shallow-ish water, but they will be more casual underwater photos, and there are some limitations.
Is a GoPro better than a compact camera?
GoPros dominate video and wide-angle action; compacts like the TG-6 or G7X II let you shoot RAW stills and tweak aperture/shutter speed for creative control. It is also worth considering how light or heavy, in the case of underwater photography, you like to travel. Although compact cameras would not take up as much space as a full rig, a GoPro is still going to be superior as far as space goes. So if the thought of being able to slide your compact GoPro into your backpack without much worry is appealing, then that’s probably your best bet.
What’s the simplest entry-level rig?
There are obviously so many different options and opinions on this. Currently, as of writing this blog, the Olympus TG-6 + a small dive light seems to be a great option for beginner underwater photography. But beware, once you get a taste of underwater photography, you may want to upgrade to bigger and better rigs as you progress.


